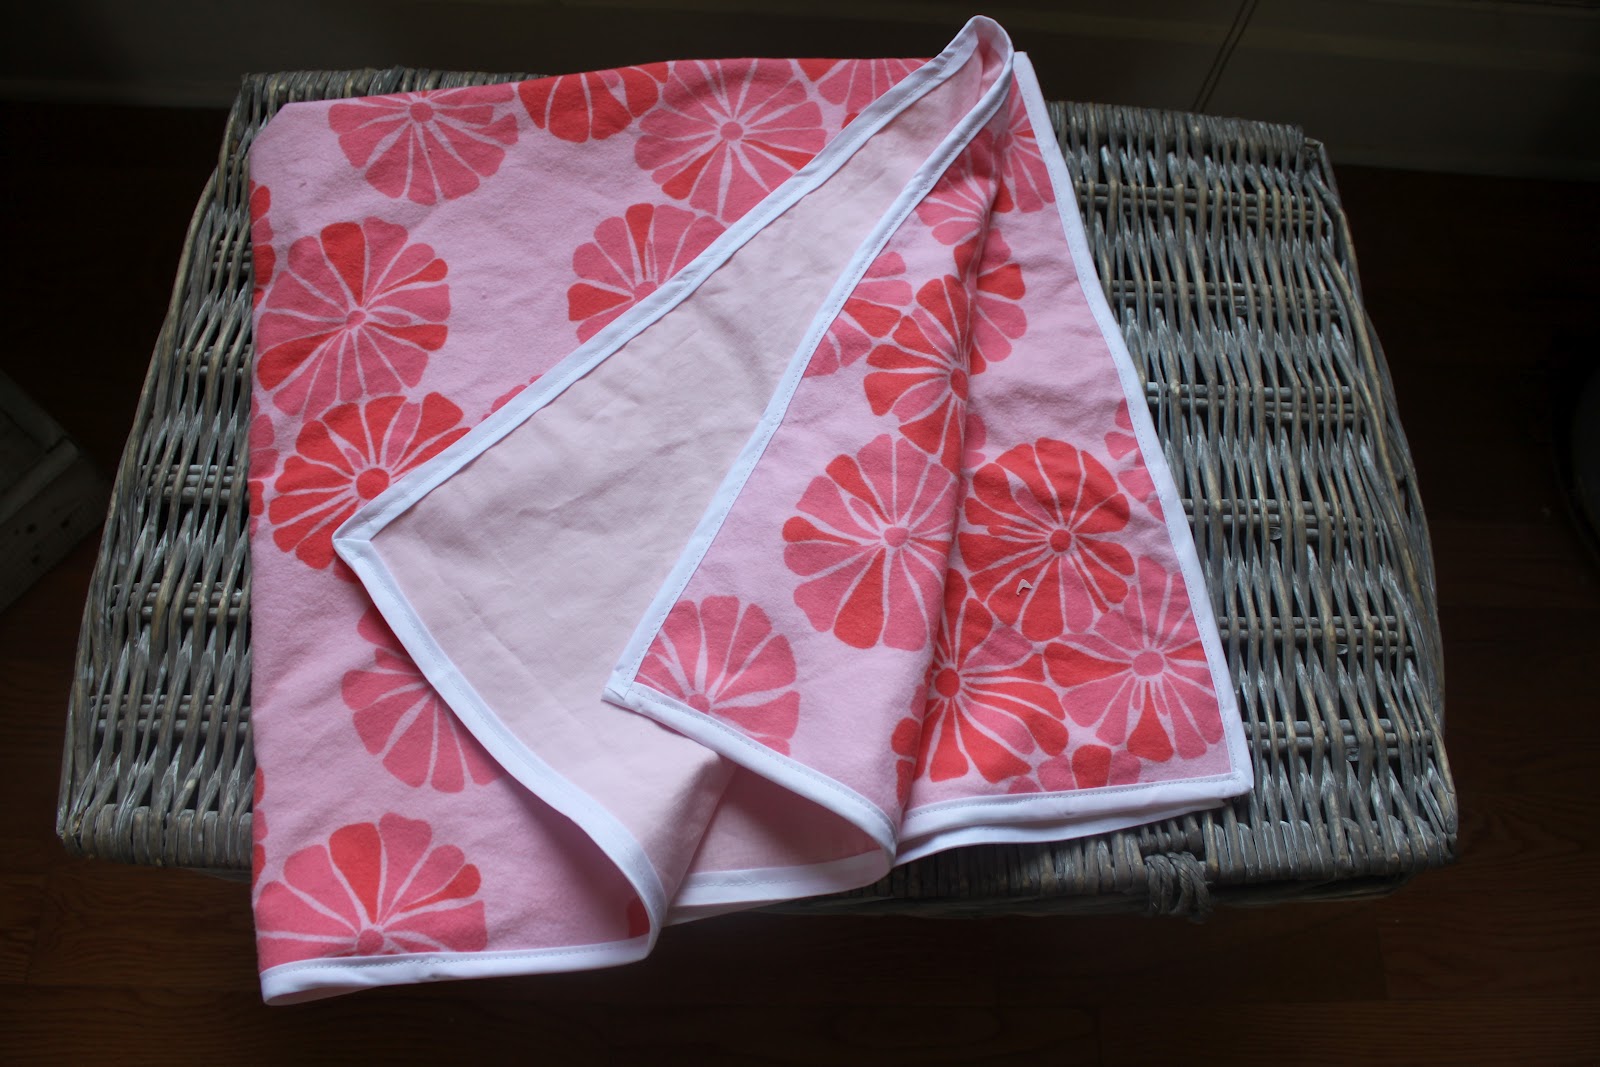
Now, I know you all know the different things I make (most likely because every time I make something new I show it off on the Facebook and the Instagram #gracefunlittlethings), but one of the things I have REALLY been loving lately are these little swaddling blankets!
 |
| I want to buy it! Take me to your Etsy shop! |
 |
| I want to buy it! Take me to your Etsy Shop! |
 |
| I want to buy it! Take me to your Etsy shop! |
They are perfect for wrapping up that new little baby to keep them warm, putting over them in the stroller on a breezy day (which we could really use in San Diego about now, btw), or as my wonderful friend Liz recently posted on FLT's Facebook page, lying out on the ground outside or at other people's houses for your baby to lie on and not have to touch the dirty, germy floor. Haha!
 |
| Keeping beautiful (and smart and strong) Penelope away from gross germs and looking stylish at the same time! |
So, now that I have talked these blankets up so much, you really have two options...
1.
Visit my Etsy shop and pick one out for yourself - In the section titled "More Fun Little Things" but I think soon to have their very own section.
2.
Make one for yourself! Super fabulous instructions right here!
Materials:
- 1 yard beautiful flannel fabric of your choosing
- 1 yard beautiful cotton or voile fabric of your choosing
- 2 packages of Dritz bias tape in a matching or coordinating color, or 4 yards bias tape if you are buying it somewhere they have it on rolls and sell it by the yard
- Matching or coordinating thread
- Pins
- A sewing machine or needle!
Easy Step by step:

For those of you who may be new to this, step 1 is always wash, dry and iron the fabric. This way any preshrinking and machine washing weirdness will happen before you painstakingly measure, cut and sew, making your end product machine washable too! A must for baby items!
Step 2:
Put Flannel and cotton wrong sides together (so the good side of the pattern, or right sides, are showing on the outside for both of them.
 |
| A big table helps, but isn't a necessity, it does not need to be totally flat and spread out like this, You can always use your bed too! Or your floor if it has less dog hair on it than mine! |
Step 3:
To make it into a perfect square, instead of an imperfect rectangle, all you have to do is take one of the straight edges, and fold it triangle - like towards one of the side edges.

Cut off the long skinny strip on one end, and straighten up the other edge if the lady at the fabric store did a less than stellar cutting job on your fabric.
Step 4:
Start at any corner and put the bias tape along the edges. When you open the bias tape, if you haven't used it before, you will realize how easy this is, even if it seems mysterious. Just put the two layers of flannel and cotton between the two sides of the bias tape, right up to the fold. Pin the tape in place at least 5 places on each edge, more if it will make you feel safer when sewing.

 |
| Ooh, pretty! |
Step 5:
You have two options at the corner. The best (most professional looking) option is to fold the bias tape so it overlaps and has a diagonal line right at the corner.
 |
| A little less pretty, but totally works! |
The other option, and what you will have to do at the 2nd and 4th corners between the two packages of bias tape, is to cut the bias tape off at the edge of the fabric, and start it again going down the other side.
Step 6:
Put your pinned blanket next to your sewing machine, take a little break, grab a beverage, maybe check your Facebook.

Step 7:
Sew straight around all 4 edges. Take out the pins! Cut off the little strings left at the beginning and end (if all went well, these should be on the same corner)!
Step 8:
You are done! Snuggle with it! Wrap your baby in it! Text pictures of it to your family and friends so they can reply with things like, omg! and so cute!
If you did not already know, and if it was not too blatantly obvious, this is my first sewing tutorial! That was fun! More to come soon with an apron I am making (actually making something for myself, just for fun)!
As a preview and a warning, if you are ever in a fabric store and you think to yourself, oh, I didn't look at that pattern, but I want to buy this pretty fabric, I think I can guess how much I need of 3 different kinds of fabric, and your mom tries to warn you, but you don't listen to her, then you wait 9 months before making the project and realize you don't have enough of one of the fabrics, you might not be able to buy anymore of it at that point and will have to buy something new.
Moral of the story... Listen to your mother!
Thank you so much for this tutorial! I love the look of these blankets + will have to pin this for the future. Really lovely!
ReplyDeleteThank you so much!
Delete